A continuing journey into the psyche of Carl La Fong, world traveler, jack of all trades, soldier of fortune, adviser to kings and potentates and lover of beautiful women. All opinions are those of Carl. The author is to be held blameless for any death or dismemberment that may result from following any of the procedures contained herein. "What the world needs, is more geniuses with humility. There are so few of us left." Oscar Levant
Saturday, December 7, 2013
Spending The Kid's Inheritance
Our old trailer is well over twenty years old and has pretty much seen its last days. So, Wifey and I went to the big RV show and bought a new one. Though it is smaller than the old one, it has a slide out, so it is much bigger on the inside. We did have to give up some storage space. The only outside storage is the compartment under the bedroom. It has no basement like the old one. We streamlined our gear and found that we carried way too much useless and redundant stuff. So, after packing everything in, we headed up to Monterey for Thanksgiving weekend. We stay at Laguna Seca raceway. It is a beautiful spot and you can watch the racers practice during the day. The weather was perfect. 70s during the day and a bit cool at night, but that's what campfires and central heating is for. One additional bit of gear that we bought was a pair of Lodge cast iron Dutch ovens. For Thanksgiving, we did a whole chicken, since it was just the three of us. Our grand daughter tagged along. I marinated it in olive oil, lemon juice, rosemary, salt and pepper. In the pot went onions, carrots, garlic, mushrooms, more lemon and a bit of dark beer. Plopped in Mr. Chicken with a sprig of rosemary under each wing. About 10 charcoal briquettes on the bottom and 15 on the lid. After an hour, or so, it was a done deal. I used the broth to make gravy for the potatoes which I did in the smaller oven,which was just set on the lid of the big one with about 10 briquettes on top. Stack cooking. Meanwhile, yams, salad and sushi (sushi?????) was being prepared in the trailer. It was quite a feast. The next morning, it was cowboy breakfast in the Dutch oven. Throw some hashbrowns, some cooked bacon, sausage, Spam, ham or whatever you have, some eggs and top with cheese. Charcoal on the top and bottom and wait about 25 minutes. Very good and filling. You could add anything else that suits your fancy, salsa, peppers, onions, whatever. That night, it was chili. I just used ground beef, three different kinds of beans, garlic, onions, canned tomatoes and Carroll Shelby's chili mix. After about an hour, I mixed up two packages of Jiffy corn muffin mix and spooned it right into the pot, covering the top of the chili. Lid back on and cook for another 15 or 20 minutes. It turned out really good. The corn bread cooked up real nice and was not soggy, on the bottom, as I feared it might be. On Saturday we ate out at Cannery Row. When we got back, I made a dump cake. Two cans of apricots in the Dutch oven, sprinkle in a yellow cake mix and a half can of Seven-Up. Same routine as before with the coals. It was good, though I think I should have let it cook for a bit longer. In all, I'm sold on Dutch oven cooking. Next time out, we'll try some other recipes.
Tuesday, November 19, 2013
I Know You Are, But What Am I?
In every battle, of any magnitude, there are collateral casualties. The same is true of internet arguments. One of the the people who decided to stick his nose into the episode, that lead to my previous post, is a particularly odious nitwit who uses the screen name, "car wash king". Though he seems to be a man of means, since he rides a one hundred thousand dollar motorcycle, he is a moron of Biblical proportions. I do not make this statement lightly. In a series of personal messages, words were exchanged. Cruel and ugly words, from both of us. In his final little love note, he made the following observations about The Boy Genius™. To whit, I am a dumbass, I am a loser and I am a derelict. I will address these individually and in order. Dumbass; The title of this blog says it all. I am a Boy Genius™. This is an irrefutable fact. Now, I will bow down to people like Stephen Hawking or the, seemingly endless, stream of Asian kids, graduating Magna Cum Laude from Harvard, Princeton and the like, but I do hold my own in the brainpower category. Loser; Where do I begin? OK, I have been with the same woman since high school. Fifty years. We are very happy. The Fongderosa, which was worth one million dollars, prior to the crash, is fully paid for, as are our vehicles. We have four beautiful granddaughters. The 22 year old is gainfully employed as a teacher. The 13 year old is in an advanced studies program at the charter school that she attends. She actually is a genius and is taking college classes while attending middle school. The 7 year old is also in a special program for advanced students at her school. The 2 year old is as cute as a bug, but kind of a stinker. Terrible twos, I guess. We have a circle of friends and have no discord amongst our family members. I've never been arrested, I don't do drugs or smoke and I drink very, very moderately. We are retired and our income is adequate for our needs. Please do not see all of this as puffery or bragging, just a rebuttal to being tagged as a loser. Derelict; Sorry cwk, but this one escapes me. I have never drank Night Train, Thunderbird or slept in a pool of my own vomit, or anyone else's vomit, for that matter. I have never eaten at the mission, except when we volunteer (BTW, we really do). I have never begged in front of a 7-11. I do not, nor have I ever, owned a shopping cart. I probably could fashion a shelter from cardboard and urine soaked blankets, but have never had the need or the desire. I've never had lice, scabies or any other, filth borne, diseases. My clothing is not second hand and finds it's way to the washing machine as needed. Now, much the same as "Other Guy", car wash king will probably never have his mother read this to him. I don't care. It is just my way of telling anyone, who reads this drivel, that the Boy Genius™ will not be mocked. It is futile for everyone, except for a small percentage of fortunate individuals who reside at the right side of the IQ/wit bell curve.
Tuesday, October 22, 2013
A Slab, A Third Wheel And A Fifth Wheel
After the realization that the latest pour was a total loss, I formed up and poured another one. I used the palm sander to vibrate it, but also used the air hammer as I had done before. After a trip to Nevada to visit little brother and his family (and cute little brand new grand daughter) I came home yesterday and pulled the slab out of the forms and flipped it over. It came out very nice, no voids and just a few bug holes. I'll try to grind and polish it tomorrow, if I have time. Our grand daughter is moving in because she got a job in our area. It is her first, real, job. In today's economy and high unemployment, she is fortunate to find full time work. She is working at a day care center. She has been taking child development classes at her local community college, so it has paid off for her. The only downside is that, at 22 years old, she has no license or car, so guess who is going to chauffeur her about? We will be pushing her towards a bit more independence and big girl behavior by finding her a car so we can enjoy the new RV that we bought last week
Tuesday, October 8, 2013
Success 2 - Failure 2
I spent this morning moving the slab to a pair of saw horses so I could begin the wet polishing process. The attempted repairs that I made, yesterday, with the Fixall/sand/pigment concoction failed almost instantly. Fixall, as I should have realized, is a plaster based material and the water and grinding action caused it to wash away like coffee grounds going down the drain. I had already decided that there was a, near 100 percent, chance that I would have to redo it. So be it. It is our home and we have to live with it. For me, at least, I plan to die in this house so, if I have to look at it every day, it needs to be right. A certain amount of, "That's good enough", does work for me, but there isn't room for very much. Back to Home Depot for another sheet of melamine board and rebar. I'll re make the form, bend up and tie the rebar tomorrow and re pour Thursday, as long as I don't have any other calamities. I am, by nature or nurture, a very impatient person as well as being a hot head. I surprised myself by not throwing one of my usual temper tantrums. Perhaps because it is a bit difficult to give a 300 pound slab of concrete a flying lesson
Into The Void
I'm supposed to be getting better at this sort of thing. I poured the third piece of the counter last week. Yesterday, I pulled it from the forms. There were a number of, very large, voids, especially at the edges. When I made the pour, I tried vibrating the mix with a palm sander, that I wrapped in plastic. It seemed to work well. The mud moved and flattened out as I pushed the sander in. Maybe I didn't hit the edges well enough to allow the mud to settle into the edges of the form. There is a possibility that I will discard the slab and do it over. In the meantime, I'm going to try to save it. I mixed a slurry of Fixall, sand and pigment and troweled it into the defects. I'm going to grind it today with the wet polisher and see how it looks. The problem, that I think will arise, is the lack of aggregate in the slurry. There might be a noticeable difference in the surface appearance since the patched areas are just sand and pigment. We'll see. I am disappointed, but remain stoic and optimistic. I will finish this job and It will look nice. I know that to be a fact because that's what Wifey told me and she is never wrong.
Friday, September 27, 2013
The Wall
Yesterday, the traveling Vietnam wall came to our town. It is an 80% replica of the actual memorial in Washington DC. I, of course, decided to go and see it. I thought it would be cool and fun, since I may never see the real one. I got out my dog tags and my old "go to hell hat" and drove over, with Wifey, to have a look see. I had no way of knowing that seeing it and reading the name of guys, that I saw die, would bring such a flood of emotion. I, like so many other vets, fell apart, recalling the horrors of war, the sights, sounds and, even, smells that haven't gone away in 45 years. Recalling the young boys, almost men but not quite, and then looking at my own face, growing old and gray while they lay, forever 19 or 20 years old in their graves. Why did I return, unscratched? By the grace of God, I suppose. I felt that I had to do something, however insignificant, to honor a few of them, so I returned home and made up a little three page memorial for 11 guys that we lost on one, particularly, bad operation. We went back and I laid it in front of the panel with their names on it. A lot of people stopped to look at it and read what I had written and to look at the faces of the boys who gave all, especially the one who willingly gave his life to save his fellow Marines by throwing himself on a hand grenade. It allowed me to speak to a number of people, who took a genuine interest in what happened in those few days when all hell erupted. Rest in peace, Bazulto, Bell, Bice, Blessing, Brothers, Cahill, Castillo, De Abre, Lee, Perkins, Walton. Also Reinke, Cooper, Novembre, Dennis, Corns, Kemmelmacher, Angerstein, Woodard, Pinnsonault, Kluge, Kemski, Tapio, Ostroff, and, God forgive me, the others, who's names time has erased from my memory
Wednesday, September 25, 2013
Mixalot Or Fixalot
Well, failure has, once again, stymied my efforts to get the counters done and installed. Yesterday, I got up, ate my Count Chocula and Strawberry Quik and headed for the shop, to pour the third piece of the puzzle. I had already built the form and bent up and tied the rebar, so everything was a go. I mixed up two bags of concrete with the correct amount of pigment and flipped the mixer over to pour the mud into a bucket. The yoke, that I had broken and brazed together, wasn't up to the task and another load ended up in the dirt. This was distressing, to say the least. I went upstairs and got on Craigslist, and punched in "Cement Mixer". I got about six or seven good hits. What is it about the people that use Craigslist? Several of the ads had phone numbers and the rest were reply by email. So I dutifully emailed each one and called the rest. Two calls went to voice mail where the voice mail had not been set up. I don't text, so no sale. By this morning, none of the emails had been answered. I was able to contact and speak, finally, with two people. Both had mixers that would work for me. I chose the one that was the farthest away and cost the most, since it was only a fifty dollar difference and the better one was twice the machine. So, two hundred bucks and a 130 mile round trip later, I have a real, honest to goodness, heavy duty towable mixer that Godzilla couldn't bust. I had to order more of the special counter top mix, since I don't have enough to finish the job, due to the two mishaps with the mixer and the one piece that was twisted. Even with all of the drama, the counters will still end up costing about four hundred bucks, exclusive of the mixer and the polisher. Not so bad and I am learning through my screwups. I've always tried to observe others and learn from their failures, but self education is capricious and even cruel at times. So, I fully expect to keep smacking my thumb with the metaphorical hammer until I decide that it smarts a little
Thursday, September 12, 2013
Swing Low, Sweet Chandelier
When I built the lattice/diffuser assembly, I knew that, at some point, I would have to access the tubes when they burned out. I hinged it from one end and I had two long lengths of chain that supported it when it was open. When closed, I just hooked the chain closer to the frame. I didn't like it. Sitting on the couch and looking into the kitchen, I could see the big wad of chain where I had taken the excess and looped it onto the hooks that I installed into the ceiling joists. Not good, sez I. I went down to the shop, this morning and whipped up two scissor arms that attach to the inside of the frame on one end and to brackets, on the ceiling, at the other end. I cut the chains down to about six inches. Now I can just unhook the short chains and lower it until the arms fully extend. For all of you safety engineers out there, the wires are temporary and will soon be encased in flex with proper fittings.
Wednesday, September 11, 2013
Bet You Thought I Would Say, "Let There Be Light." Well, I Didn't
Today I hung a six tube, four foot, fluorescent fixture above the diffuser that I built the other day. I'm pretty pleased with the outcome. I don't think it will really provide the light we need for the entire kitchen. There is an, existing, recessed light over the sink which, also, is not bright enough. I will be upgrading it with something that puts out more light. We had planned on one or two pendant, lamps over the dining counter and another recessed can over the wall desk. I'm certain that these will give us all the light we need. There is still the option of under cabinet lighting, but I don't think that will be necessary.
Tuesday, September 10, 2013
Time To Lighten Up A Little
Wifey and I went looking at lighting the other day. We went to the box stores and a lighting store. We ended up confused. Flush mount, semi flush, pendant, under counter, recessed, LED, halogen, fluorescent, nickle, brass, bronze, chrome, lions and tigers and bears, oh my! We went home, empty handed. I sat on the couch and stared at the empty recess where the old fluorescent fixtures and plastic diffusers use to be. We had considered putting two semi flush three bulb fixtures in it, but I just couldn't get excited about the idea. I thought, what if I build some sort of hanging or floating shade or diffuser, that looked like it belonged in the recess, rather than some compromise that I would never, really, be happy with? Yesterday and today was spent building this. It took a few hours to rip and cut all of the half lap joints for the lattice. The frame was simple, just cut to length and miter the ends. I nailed in the lattice and finished it with quarter round. I think it looks pretty good. It doesn't look store bought and it fits the opening nicely. I made it six inches smaller, all the way around, than the opening. The light will shine through the lattice and bounce off of the ceiling and the sides of the recess, so it will look as if it is floating. I may put plastic diffuser panels on top of the lattice. We'll see. I'm not sure what I will do for the actual lamps. I'm thinking about a couple of four tube florescent fixtures. We had fluorescents in there originally and I never liked them. I was, forever, changing out bad tubes. Still, they may be the best way to go. As always, we'll see. In the meantime, I need to take it down and back to the shop for stain and finish. I still have to de ugly that hole in the ceiling. It's for the HVAC
Friday, August 30, 2013
Looking For Closure
I finished up the last of the cabinet doors. Well, almost. The two doors for the far right side cabinet came out a teensy bit short, due to a measuring error. I hung them and if you didn't look closely, you barely noticed that they were only an eighth of a inch taller than the opening. I mulled it over, in my mind, and told myself it would be OK. I removed all of them to take them back to the shop to spray the finish. As I carried them down the steps, two of them fell and broke. Guess which two? Seven doors and the two shorties bite the dust. Pretty long odds, so two new doors it is. We happened to go to the local OSH store to see what kinds of knobs and pulls they had. The store, near us, is closing and everything was on sale. We picked up some that we liked for a pretty good price Wifey chose them, so I'm sure they're perfect. All of the woodworking, for this project, is done. I will be building a rolltop breadbox, to match the desk that I built earlier but it is not critical to finishing the job.
Wednesday, August 28, 2013
A Large And Painful Movement
I managed to get the large counter top into the house and set in place. It was touch and go. At it's smallest dimension, it is, exactly, the width of the patio sliding door. It took about ten tries before I was, finally, able to get it through the door and on the cart, that I built. The cart was knocked together from two by fours and some big, industrial casters that I got in a dumpster diving expedition. There was some damage, I'm afraid. Three small areas splalled out of the edges. I should be able to patch them. Even though I had set the slab on a cradle that was built from wood, there was still enough pressure against the edges that they popped when I lifted it. Another lesson learned. Next time I'll be sure to have it supported, at least, an inch , or so, in from the edges. In all, it came out OK. A bit of repair and some re polishing and everything will be hunky dory. Tomorrow, we should have all but two of the lower doors installed.
Friday, August 16, 2013
Thump Thump.....Thump Thump.....Thump.....Thump.....Aw, Crap
I'm planted on the couch, right now. I was in the process of picking up the counter and bringing it up to the house. I did receive the polishing drums, yesterday, and I finished the curves, around the sink opening. For those who are unfamiliar with the Fongderosa, we have two and a half acres. The house sits on a hill and the shop is down below. I made a cradle for the slab from 2X8s so I can lift it without damaging the concrete. I pulled the tractor up to the table, secured chains to the cradle and picked it up. It was all the little John Deere could handle and I had to prop the loader up with a pole so all the weight on the bucket wouldn't push the bypass valve open. Then I felt that familiar feeling as I went into atrial fibrillation. CRAP!!!. I did manage to get the tractor, and it's cargo, up the driveway and safely to the back door. I should be OK in a few hours, or tomorrow morning at the latest. I did, also, manage to get the raised panel blanks, for the lower cabinet doors, glued up prior to the "incident". I hope to build the cart, that I will use to transport the counter from the back door to the kitchen, tomorrow. If all goes well, we should have the entire counter and cabinets done in three or four weeks. I'm getting pretty exited. Everything that goes in, lately, has really made a difference in the overall look of the room. It has taken, so far, about as long as I figured it would. I have no over blown sense of my capabilities and I knew, from the get go, that this wasn't going to be a weekend project.
Thursday, August 15, 2013
Sometimes Life Throws You A Curve
Hundreds of you have asked, "Carl, what about the second part of the counter that you made a while back?" Well, after trying to finish the edge of the sink cutout, I realized that I will have to pony up a few more bucks and buy a set of diamond grit polishing drums. It's just the only way to get an inside curve polished to the same finish as the top. That's another 125 dollars for tools and expendables. Of course, they will last me for quite a long time as they will be used very little. Sometimes when ya gotta, ya just gotta. The piece should be ready to install in a day or so. Then the table will be free to form up and pour number three
Wednesday, August 14, 2013
Facing Reality
A few days ago, I made all of the drawer faces. They are the easiest part of making cabinets. Just cut them to size, rout the profile on the edge and it's a done deal. I've stained them and will spray the finish in a few days.
We have to choose knobs or pulls for them pretty soon. There are about 20 drawers and doors in the kitchen and the hardware, that we've looked at, ranges from a few bucks to 12 dollars, each. That's a potential outlay of $250 for pulls. If that's what it takes to get what we want, then we'll just have to spring for them. Overall, it doesn't matter. I suspect that what we will have, when done, is a 15 to 20 thousand dollar remodel. I have not kept track of costs (I wish I had) but far less than that has been spent, to date.
Today, I installed the new drawer faces. We may, actually, have a finished kitchen in the very near future. Along with the faces, I cut and routed all of the rails and stiles for the lower cabinet doors today. I should have them assembled by the end of the week. They will have straight tops, rather than the arched tops that the uppers have. I felt it might be too busy looking with all that detail. That plus they're way easier to make. The missing face, under the sink will be a flip out holder for sponges, dishrags, etc. I have to order the tray and hardware for it.
Sunday, August 11, 2013
Having A Blast
Yesterday and today was spent trying to sandblast the glass for the upper cabinet doors. This did not occur without the usual drama. First, the HVAC foil tape, that I used to mask the pantry door just proved too frustrating to use. It does work well, but it is a bear to work with. It is very sticky and difficult to remove after cutting the pattern. You have to pick it off, little at a time and it, sometimes, leaves a residue that is hard to remove. So, I thought I'd try self stick shelf paper. No good. It is not thick enough and the sandblaster blows it away. I then tried regular blue painters tape. It worked OK, but, it too, is too thin and will also blow away if you're not very careful. I spoiled one pane of glass and managed to do one that came out nice. Pretty poor success ratio. Duct tape is too gummy and doesn't leave a sharp edge. I also tried Gorilla Tape. A bit better, but still not good enough. I finally went to the local sign shop and got some adhesive backed vinyl sheet. This proved to be the hot setup. It adheres to the glass, but peels right off. It cuts easily, it takes pencil marks well so it's easy to follow the layouts with the hobby knife and it didn't cost an arm and a leg. I did manage to, clumsily, drop one pane and break it after masking and blasting it. Harsh language was heard, emanating from the shop. So far, I've ruined three pieces off glass. I believe I have a system now and should have the rest done by tomorrow. Well, tomorrow is today and all of the doors are installed. It really makes a difference in the looks of the kitchen. It now has one, unified look, rather than seeing all of our Melmac and cheap plastic water tumblers
Thursday, August 1, 2013
I Can See Clearly Now...........For A While, Anyway
Yesterday, I bought four panes of glass and cut all of the pieces for the upper cabinet doors. The next step is to mask them and sandblast the pattern, like I did with the pantry door. I also dragged the new, small, counter up to the house and swapped it with the wavy one. It sits much better. Nice and level. When sealing this one, I applied two coats of the stuff. After it dried, it had an orange peel texture. I grabbed the random orbital sander and went over it with a 320 grit pad. After that, I hit it with 0000 steel wool, some automotive rubbing compound and then a couple of coats of wax. It has a very nice luster without a fake plastic look. I like it. Besides all of this, I had time to paint four cabinet doors that I built for a storage cabinet at our church. Three major things done, no blood spilled......pretty good day, I'd say
Monday, July 29, 2013
Flippin', Not Trippin"
The second part of the puzzle was pulled from the forms the other day. It took a bit of doing to flip it over, but with the, now repaired, engine hoist it was pretty easy. I spent two or three hours yesterday, grinding and polishing it. It did have a groove where the two pieces of Melamine board were joined. I figured that the clear, packing tape would make a seamless joint but, somehow, I think moisture got into the particle board core and the edges swelled a bit. Fortunately, I was able to grind them away and there is no trace of them now. I still have to finish the edges. The curved portion, where the sink goes, may be problematic. We'll see tomorrow. I have thought about how I will install it. In keeping with my, "I don't need any stinking help." attitude, I think I can build a cart that is just a little higher than the cabinets, roll it into the kitchen and slide it in place. Time will tell.
Friday, July 19, 2013
Comin' Round The Bend
This is the completed form for the next portion of the counter. It will be the most complicated one. It wraps around the corner and, also, has the cutout for the sink. Actually, it has a cutout for half of the sink. The next piece will have the other half. There will be a small joint where the two butt together, which I will fill with epoxy. The cutout, itself, is made from foam boards, cut to shape on the band saw and edged with clear packing tape. Since the form is large, two pieces of the Melamine board had to be joined. I just butted them together, tossed in a few screws to be sure they both level up and then I ran a strip of the packing tape to seal it up and cover the screw heads. There will be an impression of the tape on the face of the slab, but it will disappear when I cut it with the coarse wheel. The rebar is held at the correct elevation with some pieces of tie wire. I did not do this for the first two slabs that I did and they stayed where they belonged. This is a bigger and heavier cage and I do not want to flip the counter over and see rebar, so I am playing it safe, this time. Once the mud begins to harden, I will cut the wires flush with the bottom of the slab and poke them below the surface. Remember, this is the bottom of the counter, so it doesn't have to be perfect. This piece, as well as the next two are considerably larger and, therefore, heavier than the first one. Moving it poses a daunting challenge. Due to my crabby nature and, generalized, anti social behavior, I have no friends or acquaintances in the neighborhood. About 25 years ago, I built an engine hoist. I pulled about a zillion engines with it and it served me well. It has sat, fallow, for a few years and, as a result, the hydraulic ram packed it in. I took it apart and found I was unable to fix it so, today, I ordered a new one from Northern Tool. It should be here in a week, so that will give me time to polish the small slab and allow the big one to cure for a week. The hoist will allow me to pick it up and turn it over, painlessly, as well as to load it in the back of my truck to transport it up to the house. This will get it as far as the patio door, which is about 15 feet from it's permanent home. Then I will have to call on the friends, that I do have, to muscle the thing in place.
Thursday, July 18, 2013
Just Keep Moving, There's Nothing To See Here
I removed the forms this morning and inspected the slab. It looks very nice. There are a couple of flaws in the forward edge, but they are minor and will be easy to fill, later on, during the polishing phase. I wanted to allow it to cure in the form for a few days, but I need the table so I can begin to set up for the next pour. I have made the template for it and it is now just a matter of transferring the template to the Melamine board. The templates are strips of 1/8 luan plywood that are cut to length and hot glued together on top of the cabinets to insure that everything will fit and flush up against the walls and overhang the cabinet faces the correct amount. No pix today. Nothing to see that we haven't already seen.
Wednesday, July 17, 2013
On The Level
Today, I re poured the small counter top. The short video clip pretty much explains it all. I didn't include the rebar installation in the video. I'll show that in the next pour, which I hope to do in the next day or two. I did have some air pockets in the first slab because I didn't vibrate the concrete. I don't have a vibrator, so I used an air chisel and a block of wood. It seemed to do a good job. The mud leveled out and bubbles appeared on the surface. We'll see in a few days when I unmold it.
Tuesday, July 16, 2013
Another Cruel Twist Of Fate
I dragged the new counter top up to the house this morning and stuck it in place. It weighs about 180 pounds, but I was able to get it up without breaking anything. It fit just fine until I put the level on it. Actually, the problem was obvious from the get go. The slab wasn't level. I stuck shims between the cabinet and the top in an effort to make it right. No dice. The whole piece is twisted, like a potato chip. When the front edge is level, the back is, almost, 1/2 inch out. A quarter inch, I could deal with. Just split the difference and call it good. When I built the form, I set it on two folding, steel, sawhorses. I made sure everything was level before I poured the mud. I believe that one of the sawhorses shifted, or the legs opened up a bit, and twisted the form. At any rate, the slab is toast. I will trim it down with my diamond blade and make a small table for the patio out of it, so it won't be a total loss. The remainder of the day was spent building a large table, in the shop, to do the rest of the pours on. I used 2X8s with some particle board for a top. I leveled it off, using a digital level that is accurate to .10 degree. The next pour should be good. The table is rock solid and isn't going anywhere. I hate screw ups, especially those that cost me money, but I half expected at least one failure. It was just two sacks of concrete mix and a bit of pigment, so the bank isn't broken.
Sunday, July 14, 2013
Not The Same Old Grind
Yesterday and today was spent grinding and polishing the slab. The initial cut was made with a 50 grit diamond cutting wheel on a variable speed, water fed grinder/polisher. It removed the top layer of cream, which is the mostly pure cement and pigment, and began to expose the underlying sand and aggregate. Interestingly, the rather shocking minty green color became much more subdued when it was cut, I think it is due to the cream possibly holding more pigment than the underlying layer and the exposing of the sand and stone soften the color. Anyway, Wifey and I really like the color now. When I was satisfied with the look, I began polishing with increasingly finer wheels until I had gotten to 2000 grit. By this time, it was as smooth as glass. The minor imperfections were filled with tile grout. This was not, entirely, satisfactory. As I polished, the water undercut the grout and left it below the surface. On the next slabs I will use a cement and pigment slurry instead. Still, I am quite satisfied with the outcome. I then applied several coats of a high gloss sealer. I am not real sure that was a prudent plan. It looked beautiful prior to the sealer and now it seems duller and the brush strokes are visible. Tomorrow, when it is fully cured, I'll have a look. I believe I can hit it with 0000 steel wool and some carnauba wax. If that fails, I'll just re polish it with the 2000 grit wheel and remove the sealer. This little piece taught me a lot. The learning curve is steep and short. It is, mostly, common sense, careful measuring and sweat equity.
Tuesday, July 9, 2013
Another Nice Mess You've Gotten Me Into
There is a special bond between a grandfather and his first grandchild. My grand daughter, Alex, and I are no different. I have always been a big fan of Laurel and Hardy. I have numerous tapes and CDs of many of their films. Ever since she was little, whenever she came to visit she always wanted to watch "The Boys". We would laugh like idiots at their antics and repeat our favorite lines to each other. Last year, for Christmas, I gave her a large, framed, poster of L&H and a complete CD collection of all their sound films. I bought a set for myself, of course. So, to commemorate our mutual love for each other and Stan and Ollie, what could be more fitting than matching tattoos. I have a few, from my Navy days, but it has been over 45 years since I sat in that chair and allowed someone to stick needles in me. I have to say that it was sort of fun. It may have been a silly thing to do but, in reality, long after I am gone, she will have that mark on her that will cause her to think fondly of her ol' Grampa and how much he loved her
http://www.youtube.com/watch?v=cAZ7p78MbrY
Mean Green
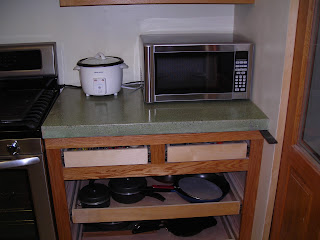
I poured the counter top. Here is a pic of the backside. It came out a, sort of, minty green. Not what I had envisioned, but the more I look at it, the more I think, "Not too bad.". I finally removed it from the form today and it looks OK. There are some air bubbles, but they are easy to fix. There is one, rather large , divot that troubles me. We will have to see if it comes out during the grinding and polishing process. I found that, in spite of information to the contrary, that the correct, variable speed, water fed concrete grinder/polishers are not available at your local rental yard for a nominal fee. I thought everything online was supposed to be the truth. I guess I've been hornswoggled again. Went to Amazon and order up one. It was under 200 bucks and I can sell it when I'm done to recoup some of my money. The truth of the matter is, I'm an incurable tool junkie and will, almost certainly, keep it. There are some more concrete project that I have in mind after the kitchen is done. Maybe a patio table and a bench for the yard.
Friday, July 5, 2013
The Fix Is In
Well, I brazed up the busted mixer and it seems OK. The picture is of the back side of the joint. It is a bit sloppy looking, so I'll add some more brass later. Time to mix up another batch of green mud.
Catastrophic Failure
Today I was going to pour the first of the concrete counter tops, the small one to the right of the pantry. I bought a sheet of Melamine coated particle board and made the form. I bent up and tied the rebar, fileted the corners of the mold with silicone and leveled up the form. Everything is good. I dumped two bags of Quikrete counter top mix in the mixer and carefully measured the pigment to achieve the forest green color that I wanted. I wrapped a trash bag around the opening of the mixer and led the dry ingredients mix. After 3 or 4 minutes I added a few gallons of water and left the mixer running. As I was working in the shop. I noticed that I didn't hear the mixer running. Hmmmm.......sometimes the pulley loosens up and I have to tighten the set screw, so I grabbed an Allen wrench and went outside to fix it. I didn't need the Allen wrench. The yoke casting broke off next to the pivot and dumped the entire load onto the ground. Bummer!!! The mix was a total loss as it was contaminated with dirt, leaves and weeds. Tomorrow I will have to try to repair it. I don't want to buy another mixer. I don't want to rent one, either. I have never welded cast iron, but I have brazed it, so that is going to be the plan of attack. Stay tuned.
Friday, June 21, 2013
Something's Wrong With My Tape Measure
I began to hang the upper cabinet doors yesterday. All was going just fine until this........ I had taken measurements of all the openings. The door or doors, if there were going to be two, needed to be one inch larger, both width and length. Guess what? Oh well, there's no choice but to make them over. I can salvage the vertical stiles, so it's not a total loss. Once they're all up and dialed in, I'll take them down for sanding and finish. Again, these will be getting frosted glass panels to match the pantry door
Tuesday, June 18, 2013
Pipe Dreams
Last week, I installed the new faucet, garbage disposal and stainless steel sink. This required some, minor, re piping for the waste line and the dishwasher hookup as well as the faucet. This all went without any great fanfare or drama. The counter top will sit on top of the sink. Wifey was very clear about that. Top mount sinks do tend to allow water and "icky" stuff to seep under the rim.
Time To Put A Lid On Things
I finished the last cabinet today. There are still doors and drawer faces to be made. I cut all of the pieces for the upper doors today and will be assembling them tomorrow. Then I'll do the lowers and the drawer faces. The next phase will be the counter tops. These will be made of concrete. There are two reasons why I chose that over all of the other materials in common use. First, of course, is cost. Other than Formica, it is about the least expensive choice, much less than granite or marble. Since I will be pouring and finishing it myself, there is no labor cost. The other reason is appearance. When ground, polished and sealed it is every bit as pretty as stone. Since this is a little out of the ordinary, I will be taking quite a few pictures, as well as a video or two to document the experiment. I started the ball rolling by ordering the concrete pigment today.
Friday, May 24, 2013
Backed Myself Into A Corner
Today I finished the plumbing, for now. There will be some minor work to be done, once I have the new faucet. I decided it was time to drag the last of the cabinets up for a test fit. Voila....they fit. I have to take them back down to the shop to add a few more structural pieces and to apply the finish, but all systems are go. The small opening on the right side, under the sink, is how we used to access the stuff in the corner cabinet. Very poor design, which is why I moved the dishwasher and designed the pull out/sliding shelf cabinet that is shown in the "Black Hole" post. Much better. There is still one, small, cabinet that goes to the left of the dishwasher. I'll knock that out in a few hours. After that, It'll be drywall time, Yaaay, just love all that dust.
Thursday, May 23, 2013
Point Of No Return
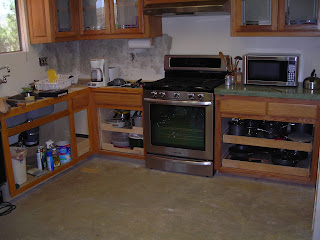
Actually, I think I passed that point a while back, but today was the big, final demolition of the project. I tore out the remainder of the old counters and cabinets. We now are sinkless and woefully lacking in horizontal surfaces. I'm already feeling the inconvenience of having no kitchen plumbing. Tomorrow I will try to rig up the new sink and some sort of makeshift counter to tide us over. Wifey decided she didn't want anything protruding up from the counter, so we are going with a wall mount faucet. According to her, icky stuff gets under all those fittings. I had to do some minor re piping since we had a deck mount faucet previously. After this project is done, I will be putting an outdoor sink and counter on the patio, that backs up to the kitchen. I ran hot and cold stubs through the wall and will also run a waste line tomorrow. The vacuum breaker for the dishwasher will go on the outside sink so the inside counter will be smooth and easy to wipe down
Wednesday, May 22, 2013
Old Sour Puss
Wifey and I were at the produce market last week and we noticed that pickling cucumbers were on sale. I thought, why not try to make some kosher dills? How hard could it be? So, after some web surfing I came up with a recipe that looked easy and didn't require a bunch of oddball stuff. I made up a brine solution with salt, vinegar, various spices and, of course, some dill. The whole deal took about an hour. Afterwards, they have to sit for 4 days, or so, until they are ready. Yesterday I felt it was time to give one the ol' taste test. I think they are the best pickles that I have ever tasted. Nice and sour, but not too much. Nice dill flavor and, since I added some hot peppers to the brine, they have a little kick to them. Not much, but enough to let you know that there's something special going on. I will not be buying store bought pickles again. These are too easy and too good to give Vlasic any more of my dough
Friday, May 10, 2013
Entering Into The Black Hole
If you have a corner cabinet in your kitchen, then you know what a waste of space they are. Things get shoved back into the dark recess and are lost until you move or die. There are bifold doors and Lazy Susan contraptions that address the problem, to a degree. The Lazy Susan offers nothing in the way of utilizing the available space and stuff falls off of them and is swallowed up by the darkness. Our existing cabinet is even worse, since the access door is very narrow and you can't even see the back without a flashlight and a mirror. I finished this cabinet today. In the normal position, when you open the (future) door, there are two shelves that pull out. When fully extended, the assembly slides to the right, exposing a second set of shelves that are hiding in the, former, unreachable area. The skinny cabinet, that will be left, next to the under sink area will be used as an appliance garage for the toaster and coffee maker. I also added a slot for a breadboard. For those having trouble following this, the cabinet goes to the right of the range, where the dishwasher is now.
Tuesday, April 23, 2013
A Bad Case Of The Cramps
After I installed the temporary dining counter a few months ago, it became obvious that it intruded too far into the family room. It just felt and looked cramped. So, with hammer in hand, I ripped out the drywall and moved the steel support assembly over, into the kitchen two feet. We lost some cabinet space, but there is still plenty for our needs. The kitchen area was quite large to begin with and now, it seems small but it is, probably, still larger than the average home has. Though it doesn't look like it in the photos, there is about eighteen inches of space between the three drawers in the old cabinet and the edge of the counter. The drawers will be moved over to the left and the dishwasher will go in their place. The permanent counter will be eight inches narrower than the wooden one and, maybe, eight inches longer. Things are moving along quite well now. I think we have our final configuration nailed down. Two more cabinets to build and we'll be ready for counter tops. What will it be? Granite? Tile? Formica? Marble? Stay tuned.
Saturday, April 20, 2013
Things Are Looking Up
I finished the, final, upper cabinet today. Not without the usual grief. I had used an existing grout line, in the tile, as my reference point. When I measured for the cabinet I wasn't paying attention and measured to the wrong grout line, so it came out 6 inches too long. I was lucky and was able to cut it down without screwing things up. I didn't even scratch the finish. Took me a few hours, but it was not as traumatic as it could have been. Note the raised panel end. There is one, just like it on the other end as well as the previously installed corner cabinet. It looks so much nicer than a flat panel
Friday, March 29, 2013
Exhausting Work
I've been busy, working on this cabinet, the past few days. It would have been done sooner, but I screwed up a couple of pieces and had to do them over. No big deal and little material was wasted. I wanted to eliminate the black hole that most corner cabinets, like our old one, have. I got rid of the wall between the main cabinet assembly and the little wrap around portion on the left. Now we can see into the corner. The end of the short section will get a raised panel cover, that matches the, upcoming doors rather than a plain, flat panel. The exhaust hood still needs to be connected to the roof vent. I'll try out my tin knocking skills tomorrow. I do have lots of duct tape.
Friday, March 22, 2013
Spicing Things Up A Bit
One of my favorite episodes of The Simpsons is the one where Homer builds Marge a spice rack. It is less than he had hoped for. While I'm waiting for the new range and hood to be delivered, I built a spice rack to go inside of the pantry. In typical "Bigger is Better" theory, this is what I came up with. We buy a lot of spices in the big jars from Costco, so the little racks that we built in junior high wood shop ain't gonna cut it. This one is four feet high and almost eighteen inches wide. Plenty of room for those big ol' containers of basil, oregano, chili powder and the other essentials of the fine gourmet cooking that takes place, here at The Fongderosa. Hop Sing cooks up a mean bowl of red.
Monday, March 11, 2013
Life Inside The Pen
I mentioned, a little while back, that I had been given some of my uncles tools and stuff. One of the tools was a Jet mini lathe. They're a neat little tool for a hobbyist. Not big enough to turn anything large, like table legs, but perfect for small artsy fartsy projects. I have not run a wood turning lathe since junior high school, but simple turning is fairly intuitive, so I thought I'd give it a shot. He had been making pens and mechanical pencils and there was a box of wood blanks that he had cut for future projects. So I grabbed a pair and drilled them through the center, glued in the brass tubes that are supplied in the kits, of which there were about 10 or 15 in the box, and put them on the mandril. I don't know what species of wood I chose, but it has a nice reddish hue and it smelled real nice as I was cutting it down. Once I got it close to finished size, I sanded it and then steel wooled it in the running lathe. I dabbed on some shellac and rubbed it in, again with the machine turned on. The remaining pieces of the pen were pressed in and, Voila!!, one functioning ball point pen, ready for the Sunday New York Times crossword puzzle. I think it came out pretty nice for my first try. Heck, that was so much fun that I went down to the shop and whipped out another one. I got fancy this time and made the two parts barrel shaped. The concentric rings on each end were done with a piece of wire, held against the spinning parts in the lathe. It burned in the rings in a few seconds. Cool, huh?
Sunday, March 10, 2013
Today, I knocked out this cabinet for the space above the refrigerator. To call it a cabinet is a bit much. It is just a shelf with a face frame. It took about an hour to build. It is a little short, but it is wide and deep so we can stash a lot of stuff in it, that will never see the light of day again. It, too, will get doors later on.
Building Boxes
I finished the first of the cabinets today. This one has pull out shelves. I will put them in all of the lower units. I hate getting down on my knees to search for a particular pot or pan, so this will make life easier. My knees, especially the right, are a bit worn out. All of the shelves and drawer interiors are covered with Formica. It makes a nice finished surface. I will wait until all of the cabinets are built and installed before I build the doors and drawer faces. That way I can set up the machines, cut all the pieces and assemble them all at once, rather than making them willy nilly, one or two at a time. The lower doors will be raised panel style. The uppers will have glass panels, much like the pantry door.
Thursday, February 21, 2013
The Chairman
The little wall desk, that I built a last month, needed a place to sit, so I knocked out this little chair/stepladder the other day. It was, supposedly, invented by Benjamin Franklin. I found a set of plans online. Since Wifey is, somewhat, vertically challenged, it will come in handy and we can get rid of the aluminum stepladder, that takes up valuable room in the pantry.
Subscribe to:
Posts (Atom)