Saturday, December 27, 2014
Weighty Issues
I expected thee holidays to be disastrous to my weight loss program. In a way, it was. Over the Thanksgiving weekend, I picked up eight pounds. Yow!! Since then, there have been three Christmas meals. With a bit of effort, my net gain is right at four pounds. Not bad. I can loose that in a week, or so. We have one more meal to deal with, the New Years feeding frenzy at my sister-in-laws house. As long as I can avoid the sweets and carbs, I should be OK. I've come to not beat myself up when I fall off of the wagon. Just get back with the program and the weight will fall off. I've yet to hit the magical 199 pound goal. Missed it by one pound, a month ago. Since I am returning to a normal eating routine, I expect to hit the mark in a month
Thursday, December 18, 2014
Open Sesame
I needed a few stocking stuffer gifts for some friends. I happened to get an email, from one of the woodworking sites that I subscribe to, this morning with some plans for these bottle openers. Cool, I thought, I'll whip out a few of them. About 3 hours of cutting, boring and staining and we have five openers. I used some walnut that I had, laying around in the shop. There is a rare earth magnet, just under the round plug on the underside, that catches the cap so it doesn't fall on the floor. A washer, screwed to the underside slides under the cap and pries it off. Works like a charm. Turned out pretty good, I think

Wednesday, December 10, 2014
Gearing Up
During one of my dumpster diving forays at work, some time ago, I happened across this ancient 42 inch slip roll. I grabbed it and tossed it into the back of my truck, very pleased with my find. Upon further examination, I discovered why it was tossed. One of the gears was missing that operates the rollers. I stuck it in the shop and figured, I'll fix it someday. Someday arrived. I could have taken the easy way out and ordered a gear from Boston Gear or Browning, but that's no fun. Realizing that all the gears are the same, I took one of them and cut a blank on my lathe the same diameter. I have accumulated a few involute gear cutters, but I did not have one in the correct pitch. I took a piece of HSS tool stock and ground it to the shape of the tooth. I was able to get it close, but it is not perfect. If it was a gear for a transmission it would howl like a banshee, but for a hand cranked machine, it's good enough. I clamped the cutter in my fly cutter and mounted it on the mill spindle. I have a large dividing head, but I had never used it, so some self educating was in order. It turns out to be pretty basic math. No algebra or trig, just simple fractions. I put the blank on a mandrel and put it between centers on the dividing head. My math told me that each cut is three revolutions of the dividing head crank plus three holes on a 39 hole plate. So off I go. Thirteen cuts later, I have a new gear. The teeth are a bit wonky because of my poorly ground cutter, but when I assembled the roller, everything works as intended. Some will say that an aluminum gear is about as good as one made from clay but as often and as hard as I will use the machine, it will last forever. While I was at it, I sandblasted all the small parts. I also chucked up the rollers in the lathe and sanded off all the rust. I reassembled it and put on a few coats of hammertone paint. Should be good to go for another 70 or 80 years. Now, I just need a spot to put it. The sucker weighs a ton. A 48 inch slip roll sells new for around 15 hundred bucks. This one cost me the price of the fuel to get it home. I had to go home that day anyway, so it was a wash.


Tuesday, December 2, 2014
Counting Carbs
In my effort to shed some weight, I've found that carbohydrates are my enemy. The other carbs, that bedevil me, are the ones that supply fuel to internal combustion engines. They are black magic. I understand the basic principle, but the finer nuances escape me. The Quadrajet, on my bike, has been a problem since day one. It used to flood when hot and restarts were difficult. I epoxied the plugs that tend to leak on these units and it seemed to work. It still never really ran right, so I sent it to a well known carb guy here in SoCal. It was much better, but I always thought it wasn't quite what it should be. A few years ago, I pulled it off and took it to an even more well known dyno tuner and he went through it again. Still, it wasn't what I had hoped for. It stinks when it idles and adjusting the idle mixture screws had no effect. I could turn them all the way in and nothing happened. I had the tank off the other day and while playing around, I noticed the primary throttle shaft was very loose in the carb body. Some Google searching told me that this is common in older, high mileage carbs. I ordered a st of repair bushings from Ninja Fuel Systems. They were 10 bucks. After getting the carb off and stripped down, it was necessary to drill out the holes in the carb body. A reamer is recommended, but I used a 3/8 drill and my drill press. Once the holes were enlarged, I tapped the bushings in with a brass hammer. When I tried to reinstall the shaft, it was too snug and wouldn't turn smoothly. I needed a 5/16 reamer, but I don't have one. I remembered an old trick. Take a length of 5/16 CRS or drill rod, if you have it. File one end at an angle about twice the diameter down the length of it and about 2/3 the diameter at the end. File as flat and as smooth as you can. The flat then can be honed on a stone. This will give you a pretty good, down and dirty reamer. I used it to align ream both bushings. The shaft fits very nice, now. The tiny 3-48 screws that hold the butterfly plates on need to be replaced. They are a one time use item. I had to order them from Fastenall. 8 bucks for 6 lousy screws. Oh well, at least I found them. They're not exactly easy to find. 


Wednesday, November 12, 2014
Yipes....Pipes
The constant dragging wore the bottoms of my pipes until they looked like Elmer Fudd's shotgun after Bugs ties the barrel in a knot. So, with a vision in my mind, I went to the local muffler shop and picked up a 90 degree, mandrel bent, piece of 2 1/2 exhaust tube. Back at the shop, I sliced it right up the middle. I then held them up to the existing pipes and decided what I thought looked good. I marked the pipes and lopped them off with the cutoff saw. After bolting them back up to the headers, I tacked the half pipes in place. Seeing that it looked good, I finish welded them. Using some cardboard, I made templates for the fillers that will form the top and bottom of the collector. The patterns were transferred to some sheet metal that I had leftover from another project. I welded these to the half pipes. In spite of my efforts to be sure it would fit, which entailed taking off and re installing the pipes eight or ten times, on the final fit up the flanges were half an inch off. Crap! I had to slice the inside pipe nearly in half and bend it in until the kerf closed up. Still not enough. One more slice and it bolted up. I welded up the kerf and it finally fit. After some trimming to get the opening even, I took some 1/4 inch rod and wrapped it around the opening to finish it off. Since the cutting, welding and grinding pretty much ruined the chrome, I decided to wrap the pipes and paint the collector. I used high temp silver/gray. I don't like the way it looked so I went with flat black instead. Looks pretty good, I think. It does sound different now. Not louder, just different.


Thursday, November 6, 2014
A Shocking Turn Of Events
Enough about me, let's talk about my motorcycle. After I finished the transmission swap, I noticed that it didn't handle as well as it used to. The rear end was mushy and it bottomed out going around corners and over minor bumps in the road. Using my highly honed skills in Euclidian geometry, I determined that the new swing arm was the culprit. It is about six inches shorter from the pivot to the shock mount. Again, relying on the wisdom of the ancients, this time, Archimedes, I realized it was a matter of leverage. I needed stiffer springs. The manufacturer is just a quick hop down the freeway from me, so off we went. They rebuilt them, new oil, gas recharge, new bump stops and new, black powder coated springs. What a difference. Though it is a bit stiffer than I'd hoped for, all of the sponginess is gone. I can lean into tight turns now without leaving pieces of exhaust pipe, ground off, in the road. Now I have to fix the pipes that I ruined 

Thursday, October 30, 2014
Magic Lantern
I have about 30, or so, reels of old home movies that my parents shot when we were kids and also of my kids when they were babies. I checked with Wally World, Costco and a few online sources and the cost to transfer them to DVD is way beyond my pay scale. So I went online and searched out a DIY solution. There were many sites and videos that showed how to modify an old projector to function as a telecine machine. That is what the pros use for digital transfer. They are all very complicated and require an electrical engineering degree, as well as mad computer skills. This exceeds the ken of the Boy Genius™, unbelievable as it may seem. I found this on a video posted on YouTube. It is, simply, a box with a mirror, set at a 45 degree angle. There is a hole that the projector shines through, onto the mirror. The image bounces and exits through the front. The screen in the front is just a piece of paper. The mirror reverses the image, but since it shows through the paper screen and you are looking at the back, you see it as it was shot. It is the a simple matter to place a camcorder in front of the screen and record it to the memory card. The mirror is a piece of stainless steel that I got from my old job. One of the guys there owes me a favor, so the total cost of this magnificent device was zero. Plus, he took me to lunch at the local Japanese restaurant. Sashimi salad, yeah! The reason for the stainless is a regular glass mirror give a double reflection. One off of the silvered backing and another off of the surface of the glass. It makes a big difference in the clarity of the video. All I have is an old digital camera, but it seems to work pretty well. I have to see if I can borrow a newer camcorder and see if it is any better than my old, coal fired, antique


Wednesday, October 22, 2014
Stash Box
I was in the shop yesterday and was feeling artistic. At first glance, this might appear to be a buffalo chip. It is a piece of burl, species unknown, that I got from my uncle's estate. A few minutes with the band saw and we have a nifty little box.


Friday, October 17, 2014
Fatty, Fatty, Two By Four.......
This morning, at my daily weigh in, I hit the 35 pound mark. 201 pounds of semi lean, mean, opinionated geezer. I really feel good. Maybe it's partly psychological, I dunno. I do know that my feet and ankles don't swell up anymore, I don't get acid reflux, my sleep apnea is, nearly, gone and I can do things, that used to wind me, much more easily now. I also have more energy. What's not to like? I'll admit, the food sorta sucks. I really want a pizza and a pitcher of beer or a nice cheeseburger and some onion rings but I have to stay the course. 180 looks easy now
Cover Those Skinny Legs
Today's project was this cover for the leg. I suppose I could have just made a wooden leg to support the counter, but I wanted precise adjustability so I could align the edges where it meets the adjacent slab. It is made from four, tapered sides, mitered and glued together at the edges. One side was left loose so it could be installed around the pipe leg. The loose side is held on with wood screws.

Undercover Work
I made up this cover for the steel supports for the dining slab. It finishes the underside nicely. I ran the power from the wall to the end of the cover. I made this end piece to accept the duplex plug. It looks difficult, but it was just a matter of screwing a metal faceplate to a piece of oak, drilling holes through the openings for the individual plugs with a Forstner bit then cleaning them up with a flush trim bit, using the metal faceplate as a guide for the bearing. I also made up a leg to support the end of the counter. I took a piece of black pipe, a coupling nut that you use to connect two pieces of threaded rod together, an a long bolt. I machined half of the nut to the inside diameter of the pipe and pressed it into the pipe. I then machined the head of the bolt so it had a short, 3/8 diameter pin on the end. I cut the pipe to length and stuck it under the counter. Once it was plumb, I drilled a shallow dimple in the floor. The little pin that I made on the bolt sits in the dimple. The it was just a matter of adjusting the bolt until the counter was level. In spite of the massive, steel support, it did saga tiny bit. Enough to mess up the grout, so adding the leg, which is what I wanted to avoid from the start, was a good idea.


Saturday, October 4, 2014
Lighten Up
Well, as I suspected, the extra lamps that I installed, while they did make a significant difference, still did not give us the light that we wanted. So, off came the diffuser and down to the shop. I made a jig to cut the holes in the side with a router and thirty minutes later, I had opened three sides of the box. I left the end, near the refrigerator, closed. There is plenty of light there. I reinstalled it and waited for night to fall. Once it got dark, it made all the difference. There is plenty of light now. So, back down it comes to finish the openings and make some clips to hold the plastic in place. In the meantime, I patched the wall where the last piece of counter went. I had it done a while back, but I cut it open again to run power to a plug that will go under the table. It's, probably, redundant and unnecessary but I figured it can't hurt and might come in handy for plugging in the vacuum or tabletop appliances.

Wednesday, October 1, 2014
Dim Bulb
After the installation of the pendant lamps, the dining area is lit pretty well. However, the remainder of the kitchen is still underlit. The main lamp is a six tube T-8 fixture. I went to Home Depot today and picked up two, two tube fixtures and tek screwed them to the sides of the existing lamp. So, we now have a total of ten, four foot, T-8 tubes to illuminate the area. The main culprit in this problem is the latticed diffuser that I built a while back. It blocks quite a bit of the light coming from the lamps. As I type this, it is still daytime. Later, this evening, I will be able to tell if the additional tubes had enough of an effect. The other thing that I may do is to open up the sides of the diffuser so the light can escape. I can just cut some windows in with a router and cover them with pieces of plastic diffuser panels. We'll see
How's It Hangin'?
We have found that there is not enough light in the kitchen. To partially address the problem, I installed two of these pendant lamps yesterday. It was pretty simple. I opened the ceiling, at the points where I wanted the lamps, and screwed in two boxes with a length of flex connecting them. I then cut out the holes, in the pieces that had removed when I opened the ceiling, for the mud rings and taped and compounded them back into place. The hard part, for me, was crawling back into the attic to connect the two boxes to the feed for the main ceiling fixture. I'm 30 pounds lighter than I was last time I was up there, but it still was painful. Still, the entire job only took, maybe, three hours of actual work. They look nice and light up the dining area nicely. Just a bit of work to do on the drywall finish around the fixtures, but I'll do that when I tackle the rest of the drywall.


Friday, September 19, 2014
Weighty Issues
Just an update on the weight loss campaign. At this point, I have lost 25 pounds. Still no six pack, but the pony keg is just a party keg now. My goal was to be 210 pounds by my 50 year reunion. Today, I am one pound from that goal. The reunion was not the focus of the program, just something that I used as a point to focus on. I guess I need another goal. Maybe 200 by Thanksgiving. We'll see.
It's The Pits, Man.
It's been a while since I've posted anything here. I haven't done much that's noteworthy lately. Each night, at dinner, I sat at the new dining extension and stared at my mac and cheese and all of the pits and divots in the counter top. I tried to convince myself that they added character to the slab. I realized that I was trying to delude myself. I'm too smart to listen to an idiot like me. It looked like Edward James Olmos' face and no amount of squinting or misplaced rationale could convince me otherwise. So, reluctantly, I yanked it out. This went rather well. I just rolled in the cart, that I built for moving the pieces, and scootched it over a little at a time. After getting it out onto the patio, I began to re grind and polish it. Many of the pits were eliminated, but some new bubbles and the deeper defects remained. I tried to apply a slurry of various patching materials, but none of them worked particularly well. I finally got a sack of Portland cement and a bottle of concrete bonding agent. Mixed them together, with a bit of water. It came out nice and smooth, like the consistency of sour cream. I applied it to the slab, waited half a day and hit it with the polisher. It leveled off very nicely. A few pits remained, so I re applied some more slurry. After three applications, I'm pleased with the results. This all went with some degree of drama. As I was helping Wifey with the dishes, (yes, even geniuses occasionally perform domestic chores) we heard a crash. It seems that a few months in the weather and the stresses of moving heavy slabs in and out of the house wasn't kind to the cart and it collapsed. Fortunately, the slab went unscathed. Using my tractor, I lifted it up and put it on some saw horses. A few hours in the shop and the cart was resurrected. I should need it just one more time after which time it will become firewood. I hope to have the counter re installed in three or four days. I still have to do the final finish polishing and the sealer coat. Tomorrow is my high school reunion, (50 years!!! Wow!!!)so I won't be doing much until Monday.

Friday, April 11, 2014
Seismic Nightmares
Yesterday, the final counter top piece went into place. It went in without a great deal of fanfare. Though it is heavier than any of the previous pieces, I was able to get it in the house and onto the beam that I installed earlier. I added some 4X4 angle iron to the wall and the end of the cabinet. I then drilled through them and the bottom of the slab and installed cinch anchors to bolt it down securely. My original plan was to have it jut out from the wall and, seemingly, float without support. As I contemplated this plan, I realized that it might not be the best idea that I've ever devised. Under ordinary circumstances it would not be a problem. The one big issue is this is SoCal, earthquake country. Having nightmares of sitting at the table during a temblor and having it crush our legs, or worse, made me rethink my original plans. As can be seen in the photo, I stuck a temporary 2X6 leg in place. I will be adding a thin leg to support the end of the counter. I'll probably use a length of black pipe and cover it with a false leg, made of oak, to match the cabinets. Not what I envisioned, but I'll sleep better knowing it should not come crashing down.

Thursday, March 20, 2014
Oh Lord, I'm Stuck In Lodi Again........Well, Actually, Palmdale
Last month, I was going to go on a ride with a bunch of guys to Big Bear, a local mountain resort area where one of them has a cabin. I packed my sleeping bag and a toothbrush as well as a few cold weather items and headed towards Barstow, a particularly unattractive place to live, but a good spot to hook up with my buddy and ride in together. A weekend of riding, eating all the wrong stuff, telling lies and other geriatric motorcycle debauchery awaited me. What could possibly go wrong? I got about 60 miles from home and the bike began to run very poorly. I pulled over to the side of the road and attempted to find the problem. It acted like a fuel issue, but everything seemed OK, yet it ran like crap. I was able to nurse it to my daughters house. The next day, I returned with my trailer and drug it home. A laundry list of things that needed to be done, including moving Wifey's mom into a assisted living facility, kept me out of the shop for a few weeks. I was, finally, able to go down and tear into it. My first suspicion was the fuel pressure regulator, but it was holding a steady 4 pounds. Next I removed the fuel filter, which is a nice billet aluminum deal that I ordered from Jeg's. It has a 40 micron stainless screen in it. I opened it up and dumped all of this crud out of it. It is all rust. I suspect that it is due to the crummy, ethanol laced, moose piss that the benevolent oil companies are foisting off onto us and calling it gasoline. I'm no chemist but I believe alcohol is hygroscopic. It attracts water, which then condenses on the inside of the gas tank and, voila, clogs up the works. I only have 2 or 3 thousand miles on the bike since the new fuel system. I'd hate to think that this will happen again so soon. I plan on another ride in two days with the same group. I hope I'm not left stranded again. I'm going to hook the trailer to the truck before I leave so if the worst happens, I can call Wifey to come and pick me up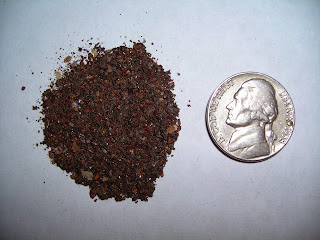

Sunday, February 23, 2014
The Final Straw
Did you ever reach a point where you said, "Enough!! This is crap and I'm done with it."? Last month, I went in for a checkup and was given a test for sleep apnea. Sure enough, I have moderate sleep apnea. I stop breathing about 10 times an hour. They set me up with a CPAP machine to wear at night to force air into my lungs when I stop breathing. Two weeks ago, I stepped on the scale and saw that I have set a new personal high for obesity. I'm 6 feet tall and weighed 236 pounds. Not a fatso, by modern, lardass American standards but, at least, 50 pounds more than a guy my height should weigh. For me, that was the point when I said it. No more. I cut back on my food intake and have been watching what I do eat and, in a bit less than two weeks, I'm down 9 pounds. 190/195 is my goal. I have not had an episode of a/fib in several months. I don't know why, but I'll take it anyway that I can get it. I don't know if loosing weight will help with it, but it sure as hell can't hurt. I need to get back on the treadmill also. I was up to 7 miles a day at 7 miles per hour and then I broke my toe. It took over a month before it stopped hurting and, by that time, I lost my desire to get back on. At 66 years old and with a family history of death of male members between 55 and 62 years old, I really am pushing my luck, carrying around all this extra fat. I've always been one to take my excesses to the limit before I get the message. So, along with cigarettes, drugs and drinking for effect, I have to say good bye to gluttony.
Wednesday, February 12, 2014
In Memorium
No silly puns or corny jokes today. In 2002, we lost our son, Tom. As anyone can imagine, it was a devastating event in our lives. Not a day goes by that I don't think of him. He was 29 and had so much to live for, especially his beautiful little girl, who is an even more beautiful 14 year old now. This happened in Kansas, where he was living. We flew there and brought him home. He was cremated and buried at our, local cemetery. I kept a small container of his ashes, planning to make some sort of urn for them. It just seemed like it was never the right time to do it. The small container sat in the closet, semi forgotten. The other day, I decided that I needed to do something. I have a bunch of really nice, exotic hardwood that I got when I helped to clean out my uncles garage. They had to put him in a nursing home and I got most of his tools and materials. I cut some 1/8 veneer from a particularly pretty piece of South American Macacauba. I laminated the veneer to some 1/2 inch birch plywood. I then cut the four sides and the top and mitered the corners. With some careful clamping, all the corners came together very nicely. I wanted real crisp, sharp corners and I managed to get them. After a good sanding down to 320 grit, I sent it to the local trophy shop for laser engraving. Tom was an avid skateboarder, so I made this little skateboard and mounted it on top. The board is maple burl and the wheels are walnut. I used brazing rod for the axles. I put a couple of strips of grip tape on the face of the board. I know the real boards have the tape covering the entire top, but I wanted the figured burl wood to show, so I took some artistic license. In all, it turned out very nice and we're both very pleased with it.


Tuesday, February 11, 2014
Framed Again
A friend asked if I could build a couple of picture frames for him. The pictures were a Japanese landscape and zebras at a water hole. The first one, I just milled up some maple into a pleasing (to me) profile for a frame. I mitered it together and cut a piece of glass for it and mounted the picture. I failed to take a picture of it. The other one, I thought I'd get a little fancier and follow the theme of the zebras. I cut some long quarter inch strips of the maple and some walnut and laminated them together. After the glue set up, I cut across the laminations, at one inch increments, and glued them up. This left me with two long, inch by three quarter strips that were dark and light every quarter inch. I then ripped these strips on the band saw to one half by three quarters. I cut the main portion of the frame from some more of the maple to the same profile as the first one. I then glued the strips to the perimeter of the frame. Cut another piece of glass and it's a done deal. I think it came out pretty nice.


Saturday, February 1, 2014
Boxing Day
No, this isn't about some British Commonwealth holiday that no one's ever heard of, much less celebrates. I made this box for the little guitar. It is made from the rest of the African mahogany with some walnut accents. The accents are there for two reasons. One is to match the walnut strips and fretboard and the other was that there wasn't enough of the mahogany left to make it deep enough. Poor planning can be a creative tool. It's hard to see in the picture, but I cut a decorative rosette pattern on the lid, using a router and a special jig. I lined the inside with some felt. The hinges and latches came from Lowes. A few coats of lacquer and a rub down and it's a done deal. As a post scrip, we were able to hook it up to an amp today, and it played just fine. I would like to build another one. I guess I'll just have to wait until someone requests one


Sunday, January 26, 2014
Pickin' And Grinnin'
I was asked, by a friend, if I would build another cigar box guitar for him. He wants to give it to a business associate of his. I decided, this time, I would attempt a resonator style. They incorporate a metal cone that the bridge rests on. The strings cause the cone to vibrate and it gives it a nice, different sound, as well as a degree of amplification. Again, I grabbed a piece of maple that I salvaged from some old church pews. I laminated a billet for the neck with it and some thin strips of walnut. The fingerboard is also walnut. I bought some fret wire from a luthier supply. The fret markers are brass on the face of the neck and on the edge. I transferred the fret positions from a guitar that I have. It has a 25 1/2 inch scale. That is, it is 25 1/2 inches from the nut, which is the piece that the strings rest on at the end of the neck, to the bridge. The scale length is very important, otherwise, you'll never tune it properly. I cut the grooves for the frets with a Japanese pull saw and a homemade miter box. The tuners were also ordered from the same people. I ordered a resonator and cover from a vendor in Texas. It looks real nice. I had selected a real pretty box that I got from the local cigar shop, but when the cone arrived, it proved to be too small. I had set my mind on the box being fancy, rather than the typical, paper covered box. I was not able to find anything at the store that was large enough and pretty enough to suit my plans. I went to the lumber yard and bought a piece of African Mahogany and set about to build a box. So, this will not be a cigar box guitar, but a pseudo CBG. I hope the purists aren't too upset. The box turned out well. I finger jointed the corners and inset the top and bottom panels in. The bottom was made up from alternating, quarter inch, maple and walnut strips. I like the way it looks. I cut two F holes in the top with the scroll saw. It was the first time that I've had a chance to use it. I sprayed 3 or 4 coats of lacquer on it, sanding and steel wooling between coats. It has a nice satin sheen. The volume knob, the neck strap knob thingys (don't know what they're called) and the bridge biscuit were turned from some maple burl that I have, laying around. The tailpiece for the strings was cut from a piece of brass stock. Since I have no idea how to tune or play a guitar, I took it to couple of guys from my church. After some tuning, they picked out a few tunes on it and announced that it played well. We were unable to connect it to an amp because either one had a cord with them so I'll have to wait until this Sunday to check it out. In the meantime, I think I'll make a nice box to put it in. The old bluesmen may have carried theirs in a gunny sack, but I think it deserves better


Subscribe to:
Comments (Atom)